
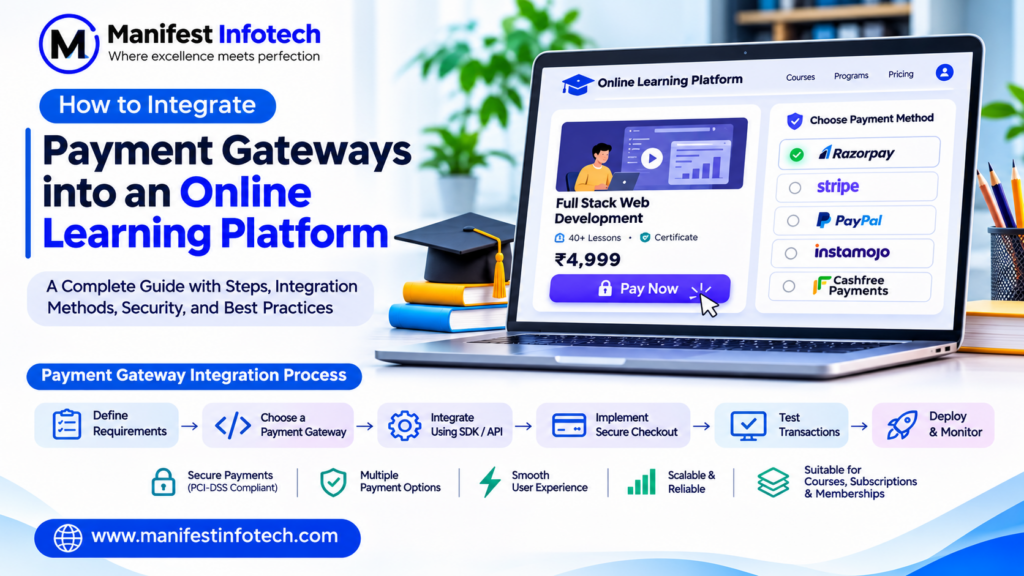
Introduction
Online learning platforms have transformed how students access education, purchase courses, and develop professional skills. From individual video courses to complete learning management systems (LMS), educational businesses are increasingly offering paid digital learning experiences.
However, providing valuable courses is only one part of building a successful e-learning business. Students also need a simple, secure, and reliable way to purchase courses, subscriptions, and learning packages.
This is where payment gateway integration for online learning platforms becomes essential.
A payment gateway allows an e-learning application to accept online payments, process transactions, verify payment status, and provide access to purchased educational content.
Whether you are building a custom e-learning application, an online course marketplace, or a subscription-based learning platform, choosing and integrating the right payment gateway can improve the purchasing experience and simplify financial management.
In this guide, Manifest Infotech explains how to integrate payment gateways into an online learning platform, including essential features, payment gateway options, development steps, Node.js integration concepts, security practices, costs, and common challenges.
What Is Payment Gateway Integration for Online Learning Platforms?
Payment gateway integration is the process of connecting an online learning application with a third-party payment service that securely processes transactions between students and the business.
When a student purchases a course, the payment gateway helps authorize and process the payment using supported payment methods.
After successful payment verification, the e-learning application can grant access to the purchased course.
For example:
- A student visits an online learning platform.
- The student selects a paid course.
- The student clicks the Buy Now button.
- The application creates a payment order.
- The payment gateway processes the transaction.
- The backend verifies the payment result.
- The student receives access to the purchased course.
This process can be automated to reduce manual work and improve the overall purchasing experience.
Why Is Payment Gateway Integration Important for E-Learning Platforms?
A reliable payment system is essential for educational businesses that sell online courses, subscriptions, certifications, and training programs.
Here are some major benefits.
1. Accept Online Payments
Payment gateway integration allows students to purchase courses without visiting a physical location or completing manual bank transfers.
Depending on the provider and country, supported payment methods may include:
- Credit cards
- Debit cards
- UPI
- Net banking
- Digital wallets
- Bank transfers
- International payment methods
Offering relevant payment options can make purchasing easier for students.
2. Improve the Student Experience
A smooth checkout process reduces unnecessary steps between selecting a course and completing a purchase.
Students should be able to view course pricing, select a payment method, complete checkout, and receive confirmation without confusion.
3. Automate Course Enrollment
After successful payment verification, the platform can automatically enroll students in the purchased course.
This eliminates manual enrollment and allows students to begin learning sooner.
4. Support Multiple Revenue Models
Payment gateway integration allows e-learning businesses to offer different pricing models.
Examples include:
- One-time course purchases
- Monthly subscriptions
- Annual memberships
- Certification fees
- Premium learning packages
- Live training session fees
5. Manage Transactions Efficiently
Administrators can track payments, refunds, failed transactions, and purchase history through a centralized dashboard.
This improves financial visibility and simplifies transaction management.
6. Expand to International Markets
Depending on provider availability and business eligibility, an online learning platform can accept payments from students in different countries and currencies.
This makes it easier to serve a geographically distributed audience.
Essential Features of a Payment System for an E-Learning Platform
Before integrating a payment gateway, identify the features your learning application requires.
1. Multiple Payment Methods
Provide payment methods suitable for your target audience.
For an Indian audience, UPI, cards, and net banking may be important. For international customers, supported card and wallet options may be more relevant.
The available payment methods depend on the selected provider, merchant account, country, and business eligibility.
2. Secure Checkout Page
The checkout page should display:
- Course name
- Course price
- Applicable taxes
- Discount or coupon information
- Final payable amount
- Available payment methods
- Terms and refund policy
Keep the checkout interface simple and mobile-friendly.
3. Automatic Course Enrollment
The platform should automatically enroll students after verifying successful payment.
For example, if a student purchases a React.js course, the application should update the student’s enrollment record and unlock the relevant course content.
4. Payment Confirmation
Students should receive confirmation after a successful purchase.
Useful notifications include:
- Payment successful
- Payment failed
- Payment pending
- Course enrollment confirmation
- Invoice or receipt
- Refund status
Notifications can be delivered through email, SMS, or in-app messaging.
5. Refund Management
Educational businesses should have a clear refund process.
Administrators should be able to review refund requests, initiate eligible refunds, and track their status.
6. Transaction History
Students should be able to view their purchase history, payment dates, course details, and available invoices.
Administrators should have access to transaction reports and payment records according to their permissions.
7. Subscription Management
For platforms offering monthly or annual memberships, subscription functionality may include:
- Subscription creation
- Renewal management
- Billing history
- Cancellation
- Payment failure notifications
- Expiration management
Recurring payments may require additional provider approval, customer authorization, and mandate configuration depending on the payment method and country.
8. Coupon and Discount Management
Allow students to apply promotional codes during checkout.
The system should validate coupon eligibility, expiration dates, usage limits, and discount amounts on the backend.
Popular Payment Gateways for Online Learning Platforms
Choosing the right payment provider depends on your target audience, business location, supported payment methods, transaction fees, integration requirements, and settlement policies.
Here are some commonly considered payment gateway providers.
1. Razorpay
Razorpay is a payment service commonly considered by businesses operating in India.
It offers payment solutions that can support eligible businesses with methods such as UPI, cards, net banking, and other supported payment options.
Useful capabilities include:
- Payment checkout integration
- Payment order creation
- Payment verification
- Webhooks
- Refund management
- Subscription-related solutions
It can be considered for Indian online learning platforms that want to accept domestic digital payments.
Official documentation: https://razorpay.com/docs/
2. Stripe
Stripe provides payment infrastructure for online businesses in supported countries and regions.
It offers APIs and checkout solutions for accepting payments and managing different billing models.
Useful capabilities include:
- Hosted checkout
- Payment intents
- Subscription billing
- Webhooks
- Refund management
- International payment support where available
Businesses should verify Stripe’s availability and eligibility requirements for their country before selecting it.
Official documentation: https://docs.stripe.com/
3. PayPal
PayPal provides online payment solutions that can be useful for eligible businesses serving international customers.
Its developer tools support checkout integration and payment-related workflows.
Useful capabilities include:
- Online checkout
- Supported international payments
- Transaction management
- Refund workflows
- Developer APIs
Official documentation: https://developer.paypal.com/docs/
4. Cashfree Payments
Cashfree Payments is another provider that businesses in India may consider for online payment processing.
Depending on merchant eligibility and the selected product, it provides payment and integration capabilities for online businesses.
Useful capabilities include:
- Payment gateway integration
- Payment APIs
- Webhook notifications
- Refund workflows
- Supported domestic payment methods
Official website: https://www.cashfree.com/
Payment Gateway Comparison
| Feature | Razorpay | Stripe | PayPal | Cashfree |
|---|---|---|---|---|
| Online checkout | Yes | Yes | Yes | Yes |
| API integration | Yes | Yes | Yes | Yes |
| Webhooks | Yes | Yes | Yes | Yes |
| Refund workflows | Yes | Yes | Yes | Yes |
| Subscription solutions | Available | Available | Available | Depends on product |
| Geographic availability | Check eligibility | Check eligibility | Check eligibility | Check eligibility |
Recommendation: For an e-learning business primarily serving Indian students, compare Razorpay and Cashfree first. For international expansion, evaluate Stripe and PayPal based on your business location and eligibility.
Always verify current pricing, transaction fees, settlement timelines, and supported payment methods directly with the provider.
Step-by-Step Guide to Payment Gateway Integration
Now let’s understand how to integrate a payment gateway into an online learning platform.
For the following development examples, we will use React.js, Node.js, Express.js, and PostgreSQL, with Razorpay as an illustrative provider.
Step 1: Define Payment Requirements
Start by understanding how students will purchase courses.
Consider these questions:
- Will students purchase individual courses?
- Will the platform offer monthly subscriptions?
- Will international payments be accepted?
- Are discounts and coupons required?
- Will refunds be supported?
- Should students receive automatic invoices?
- Will instructors receive a share of course revenue?
- Will the platform support multiple currencies?
Clearly defined requirements help you select an appropriate payment provider and integration architecture.
Step 2: Create a Payment Gateway Account
Register with your selected payment gateway and complete its merchant onboarding requirements.
After account verification, the provider generally supplies API credentials for testing and production.
These may include:
- API key or public key
- Secret key
- Webhook configuration
- Merchant account details
- Supported payment methods
Use test credentials during development.
Never expose secret keys in frontend JavaScript, public repositories, or mobile application source code.
Step 3: Design the Payment Architecture
A typical payment integration involves three major components.
Frontend application:
- Displays course details and prices.
- Collects checkout information.
- Starts the payment process.
- Displays transaction status.
Backend application:
- Validates the course and price.
- Creates payment orders.
- Verifies payment signatures.
- Processes webhook notifications.
- Updates enrollment records.
Payment gateway:
- Displays or processes the payment interface.
- Authorizes transactions.
- Sends payment status notifications.
- Supports eligible refunds and other payment operations.
The backend should remain the trusted source for payment verification and course access.
Step 4: Create a Payment Database Structure
Create separate database tables to maintain course purchases, payment transactions, and enrollment records.
A simplified PostgreSQL payment table could look like this:
CREATE TABLE payments (
    payment_id BIGINT GENERATED ALWAYS AS IDENTITY PRIMARY KEY,
    user_id BIGINT NOT NULL,
    course_id BIGINT NOT NULL,
    gateway_order_id VARCHAR(150) UNIQUE NOT NULL,
    gateway_payment_id VARCHAR(150) UNIQUE,
    amount NUMERIC(12,2) NOT NULL,
    currency VARCHAR(10) DEFAULT 'INR',
    payment_status VARCHAR(30) DEFAULT 'pending',
    created_at TIMESTAMP DEFAULT CURRENT_TIMESTAMP,
    updated_at TIMESTAMP DEFAULT CURRENT_TIMESTAMP
);
A separate enrollments table can store course access:
CREATE TABLE enrollments (
    enrollment_id BIGINT GENERATED ALWAYS AS IDENTITY PRIMARY KEY,
    user_id BIGINT NOT NULL,
    course_id BIGINT NOT NULL,
    payment_id BIGINT REFERENCES payments(payment_id),
    enrollment_status VARCHAR(30) DEFAULT 'active',
    enrolled_at TIMESTAMP DEFAULT CURRENT_TIMESTAMP,
    UNIQUE (user_id, course_id)
);
For production systems, consider additional fields for refund status, payment attempts, webhook processing, invoice references, and audit history.
Step 5: Create the Backend Payment API
Use Node.js and Express.js to create an API that generates payment orders.
A simplified example:
const express = require("express");
const Razorpay = require("razorpay");

const router = express.Router();

const razorpay = new Razorpay({
  key_id: process.env.RAZORPAY_KEY_ID,
  key_secret: process.env.RAZORPAY_KEY_SECRET
});

router.post("/create-order", async (req, res) => {
  try {
    const { courseId } = req.body;

    // Authenticate the user and retrieve
    // the course price from your database.
    const course = await getCourseFromDatabase(courseId);

    if (!course) {
      return res.status(404).json({
        message: "Course not found"
      });
    }

    const amountInPaise = Math.round(
      Number(course.price) * 100
    );

    const order = await razorpay.orders.create({
      amount: amountInPaise,
      currency: "INR",
      receipt: `course_${course.id}`
    });

    // Save the order and pending payment
    // in your database before returning it.

    res.json({
      orderId: order.id,
      amount: order.amount,
      currency: order.currency,
      keyId: process.env.RAZORPAY_KEY_ID
    });

  } catch (error) {
    res.status(500).json({
      message: "Unable to create payment order"
    });
  }
});

module.exports = router;
This is an illustrative example. Functions such as getCourseFromDatabase must be implemented, and the endpoint must include authentication, input validation, price verification, error handling, and database persistence.
Important: Always calculate the payable amount using trusted server-side course pricing. Never accept the final amount directly from the frontend.
Step 6: Integrate the Payment Gateway with React.js
Once the backend creates an order, the frontend can open the provider’s checkout interface.
A simplified Razorpay checkout example:
const handlePayment = async (courseId) => {
  const response = await fetch(
    "/api/payments/create-order",
    {
      method: "POST",
      headers: {
        "Content-Type": "application/json",
        "Authorization": `Bearer ${token}`
      },
      body: JSON.stringify({ courseId })
    }
  );

  const order = await response.json();

  if (!response.ok) {
    throw new Error("Unable to create payment order");
  }

  const options = {
    key: order.keyId,
    amount: order.amount,
    currency: order.currency,
    order_id: order.orderId,
    name: "Online Learning Platform",
    description: "Course Purchase",

    handler: async function (result) {
      await fetch("/api/payments/verify", {
        method: "POST",
        headers: {
          "Content-Type": "application/json",
          "Authorization": `Bearer ${token}`
        },
        body: JSON.stringify(result)
      });
    }
  };

  const checkout = new window.Razorpay(options);
  checkout.open();
};
The frontend callback should display a pending or confirmation state until the backend confirms the transaction.
Do not unlock the course merely because the checkout window reports success.
Step 7: Verify Payment on the Backend
Payment verification is one of the most important parts of payment gateway integration.
The backend must verify that the transaction is genuine before granting course access.
For Razorpay, payment signature verification uses HMAC SHA-256 with the server-side secret key.
Example:
const crypto = require("crypto");

function verifyPaymentSignature({
  orderId,
  paymentId,
  signature
}) {
  const body = `${orderId}|${paymentId}`;

  const expectedSignature = crypto
    .createHmac(
      "sha256",
      process.env.RAZORPAY_KEY_SECRET
    )
    .update(body)
    .digest("hex");

  const received = Buffer.from(signature, "hex");
  const expected = Buffer.from(
    expectedSignature,
    "hex"
  );

  return (
    received.length === expected.length &&
    crypto.timingSafeEqual(received, expected)
  );
}
After signature verification, retrieve or reconcile the payment status with the provider and confirm that the payment belongs to the expected order and amount.
Only then should the backend mark the payment as successful and activate the corresponding enrollment.
Step 8: Implement Webhooks
A webhook is a server-to-server notification sent by the payment provider when an event occurs.
Common payment events include:
- Payment successful
- Payment failed
- Refund initiated
- Refund processed
- Subscription charged
- Subscription cancelled
Webhooks are important because the student may close the browser, lose internet connectivity, or fail to return to the checkout page after payment.
Your webhook endpoint should:
- Receive the provider’s event.
- Verify its signature using the raw request body and webhook secret.
- Check the event type.
- Identify the corresponding transaction.
- Process the event safely.
- Update payment and enrollment records.
- Store the event for audit and troubleshooting.
Implement idempotency so that repeated webhook deliveries do not create duplicate enrollments or process the same transaction multiple times.
Step 9: Automate Course Enrollment and Notifications
After payment is verified, the backend should activate the student’s course enrollment.
A typical workflow includes:
- Update payment status to successful.
- Create or activate the enrollment.
- Record the transaction reference.
- Generate an invoice or receipt where required.
- Send a payment confirmation email.
- Notify the student that the course is available.
Use a database transaction or another reliable processing mechanism to keep payment and enrollment records consistent.
Step 10: Test and Deploy the Payment Integration
Before launching, test the complete checkout and payment lifecycle.
Important testing scenarios include:
- Successful payment
- Failed payment
- Cancelled checkout
- Pending payment
- Duplicate payment notification
- Invalid signature
- Webhook retry
- Refund processing
- Course enrollment after payment
- Unauthorized course access
- Network interruption
- Concurrent purchase attempts
Use the payment provider’s sandbox or test environment before switching to live credentials.
Payment Gateway Integration Architecture
The following workflow illustrates how payment processing works in an online learning application.
Student
   |
   v
Select Course
   |
   v
React Checkout Page
   |
   v
Node.js Backend
   |
   v
Create Payment Order
   |
   v
Payment Gateway
   |
   v
Student Completes Payment
   |
   v
Backend Verification
   |
   v
Webhook Reconciliation
   |
   v
Update Payment Status
   |
   v
Activate Course Enrollment
   |
   v
Send Confirmation
This architecture separates the checkout interface from payment verification and course access management.
Payment Security Best Practices
Payment security should be considered from the beginning of development.
An online learning platform processes financial transactions and may store personal information, purchase history, and enrollment records.
Follow these security practices:
1. Never Store Raw Card Details
Avoid storing sensitive card numbers, CVV values, or other payment credentials in your application database.
Use the payment provider’s hosted checkout or approved tokenization solutions.
2. Use HTTPS
Secure communication between the browser, backend, and payment services using HTTPS.
3. Protect API Credentials
Store secret keys in environment variables or a suitable secrets management service.
Never commit production credentials to GitHub or expose them in frontend code.
4. Verify Payment Signatures
Validate payment signatures and webhook authenticity on the backend.
Never trust frontend payment status alone.
5. Implement Idempotency
Make payment creation, webhook processing, and enrollment operations safe against duplicate requests.
6. Use Role-Based Access Control
Students should only access purchased courses. Administrators and finance staff should have appropriate permissions for payment reports and refunds.
7. Maintain Transaction Logs
Record payment attempts, provider references, webhook events, refunds, and status changes for troubleshooting and audits.
8. Follow Applicable Payment Security Requirements
Use a provider-hosted or tokenized payment flow to reduce the handling of sensitive card data. Understand the applicable PCI DSS requirements and your provider’s compliance responsibilities.
For Indian businesses, also review applicable payment, tax, consumer protection, and data protection requirements.
How to Handle Failed Payments and Refunds
Payment failures are common in online transactions. They may happen because of insufficient funds, network problems, bank restrictions, authentication failures, or provider errors.
Your application should handle these situations clearly.
Failed Payments
When a payment fails:
- Keep the payment record for transaction history.
- Display a clear failure message.
- Allow the student to retry when appropriate.
- Avoid creating duplicate enrollments.
- Reconcile the final transaction status with the payment provider.
Refund Processing
When a refund is approved:
- Administrator reviews the refund request.
- Backend checks the original payment.
- Refund request is submitted to the payment provider.
- Refund status is recorded.
- Student receives a notification.
- Course access is handled according to the platform’s refund policy.
Do not assume a refund is complete simply because the request was accepted. Track the provider’s final refund status.
How Much Does Payment Gateway Integration Cost?
The cost of integrating a payment gateway into an online learning platform depends on the payment provider, number of payment methods, subscription requirements, checkout customization, security, and backend complexity.
The following figures are illustrative development estimates, not fixed market quotations.
| Integration Level | Estimated Cost (USD) | Typical Features |
|---|---|---|
| Basic | $500–$1,500 | Single gateway, basic checkout, payment verification |
| Intermediate | $1,500–$4,000 | Multiple payment methods, webhooks, refunds, invoices |
| Advanced | $4,000–$10,000+ | Multiple gateways, subscriptions, advanced reporting, complex workflows |
Additional expenses may include:
- Payment gateway transaction fees
- Subscription or recurring payment charges
- Currency conversion fees
- Cloud hosting
- SMS and email notifications
- Maintenance and support
- Security assessments
Always confirm the provider’s current commercial terms before estimating ongoing transaction costs.
Common Challenges in Payment Gateway Integration
1. Payment Status Mismatch
Sometimes the checkout page and backend may show different transaction statuses because of delayed responses or interrupted connections.
Solution: Use signed webhooks, provider-side reconciliation, and clear transaction state management.
2. Duplicate Transactions
Repeated requests or webhook deliveries may cause duplicate processing.
Solution: Implement idempotency keys, unique transaction references, and database constraints.
3. Security Vulnerabilities
Exposing secret keys or trusting frontend payment responses can lead to unauthorized transactions.
Solution: Keep sensitive operations on the backend and verify payment authenticity.
4. Payment Gateway Downtime
A provider may temporarily experience service interruptions.
Solution: Handle failures gracefully, communicate transaction status, and consider a secondary gateway only when the business requirements justify it.
5. International Payment Support
Different countries may have different payment methods, currencies, regulations, and provider eligibility requirements.
Solution: Select providers based on your target markets and verify regional support before implementation.
How Manifest Infotech Can Help
Integrating a payment gateway into an online learning platform requires more than connecting a checkout button. It involves secure backend development, payment verification, transaction management, database design, and reliable course enrollment workflows.
Manifest Infotech helps businesses develop modern software solutions that support digital education and online business growth.
Our development capabilities can support:
- Custom e-learning platform development
- Learning Management System (LMS) development
- Payment gateway integration
- React.js and Next.js development
- Node.js and Express.js backend development
- PostgreSQL and MongoDB database development
- API development and integration
- Cloud deployment and application maintenance
Whether you are launching a new online course platform or upgrading an existing LMS, our team can help you build a secure and scalable payment experience.
Visit https://manifestinfotech.com/ to explore our services and discuss your software development requirements.
Conclusion
Payment gateway integration is an important part of building a successful online learning platform. It allows educational businesses to accept course payments, manage subscriptions, automate enrollment, and simplify transaction management.
To implement payment processing successfully, select a suitable payment provider, design a reliable backend architecture, create secure payment APIs, verify transactions, implement webhooks, and automate course enrollment.
Most importantly, never rely only on frontend payment responses to grant access to paid content.
With the right architecture and security practices, businesses can build an online learning platform that provides students with a smooth checkout experience while maintaining reliable payment management.
Frequently Asked Questions (FAQs)
1. How do I integrate a payment gateway into an online learning platform?
Choose a payment provider, create a merchant account, configure API credentials, build backend payment APIs, integrate checkout into the frontend, verify transactions, and automate course enrollment.
2. Which payment gateway is best for an e-learning platform?
The best provider depends on your business location, target audience, supported payment methods, transaction fees, and subscription requirements. Indian businesses may compare Razorpay and Cashfree, while eligible international businesses may evaluate Stripe and PayPal.
3. Can I integrate Razorpay with React.js and Node.js?
Yes. React.js can display the checkout interface, while Node.js and Express.js can create payment orders, verify signatures, process webhooks, and update enrollment records.
4. How can I automatically enroll students after payment?
After verifying successful payment on the backend, create or activate the student’s enrollment record and grant access to the purchased course.
5. Is payment gateway integration secure?
It can be secure when implemented with HTTPS, protected API credentials, signed payment verification, authenticated webhooks, secure checkout, and appropriate access controls.
6. Can an e-learning platform accept recurring payments?
Yes. Eligible payment providers offer subscription or recurring billing solutions. These may require additional customer authorization and provider-specific configuration.
7. What happens if a student pays but does not receive course access?
The platform should reconcile the payment with the provider, verify the transaction, and activate the enrollment if payment is successful. Webhooks and a transaction reconciliation process help resolve such cases.
8. Can I accept international payments for online courses?
Yes, if your payment provider supports your business location, target countries, currencies, and applicable transaction types.
9. Should I store students’ card information in my database?
No. Avoid storing raw card numbers and CVV values. Use a payment provider’s hosted checkout or approved tokenization solution.
10. How much does payment gateway integration cost?
Costs depend on the provider, payment methods, subscription features, security requirements, and development complexity. A basic integration is generally less expensive than a multi-gateway platform with advanced billing and reporting.
Official external references
Add these links to the relevant sections of your blog:
- Razorpay Payment Documentation — orders, checkout, payment verification, and webhooks.
- Stripe Payments Documentation — payment APIs and checkout.
- PayPal Checkout Documentation — checkout integration.
- PCI Security Standards Council — payment card security standards.
- OWASP API Security Project — API security best practices.