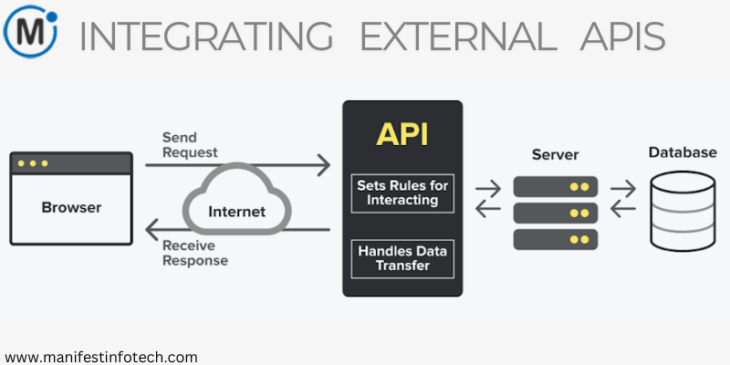
In today’s digital landscape, applications thrive on the ability to connect with external services. APIs (Application Programming Interfaces) make this possible by acting as intermediaries that enable systems to exchange data and perform tasks efficiently. Servoy, a powerful low-code development platform, simplifies API integration, enabling developers to unlock new functionalities and enrich their applications.
This guide explores the steps and best practices for seamlessly integrating external APIs into Servoy applications.
Why Integrate External APIs?
External APIs provide pre-built services and data, saving time and effort. Here’s how APIs can enhance your Servoy applications:
1. Expand Application Capabilities
Integrate advanced features such as payment processing, geolocation, or machine learning directly into your application without building them from scratch.
2. Save Development Time
APIs allow developers to leverage third-party solutions, reducing the need for extensive custom coding.
3. Deliver Real-Time Experiences
By integrating APIs, you can pull dynamic, up-to-date information, improving user engagement and satisfaction.
4. Ensure Scalability
API integrations make applications more adaptable, enabling connections with evolving external services.
Steps to Integrate APIs in Servoy
1. Understand the API
Start by studying the API documentation to understand:
Available endpoints
Request methods (e.g., GET, POST, PUT, DELETE)
Data formats (JSON, XML, etc.)
Authentication requirements (e.g., API keys, OAuth)
2. Configure Servoy to Handle API Calls
Servoy’s scripting environment makes it easy to manage HTTP requests. Use the plugins.http module or standard JavaScript libraries for API interaction.
Example of a GET request using plugins.http:
var response = plugins.http.getData(‘https://api.example.com/data’, { key: ‘your_api_key’, param: ‘value’ }); var result = JSON.parse(response);
3. Implement Authentication
Secure APIs typically require authentication methods like:
API Keys: Include them in request headers or query parameters.
OAuth Tokens: Use Servoy to handle the token exchange and storage securely.
Example of passing an API key:
var options = { headers: { ‘Authorization’: ‘Bearer your_api_key’ } }; var response = plugins.http.getData(‘https://api.example.com/protected-resource’, options);
4. Parse and Use API Responses
API responses are often returned in JSON or XML. Parse the data and map it to Servoy UI components.
Example:
var weatherData = JSON.parse(response); forms.weatherForm.weatherLabel.text = weatherData.current.temperature + ‘°C’;
5. Handle Errors Gracefully
Plan for potential errors such as:
Network issues
Rate limits or quota violations
Invalid responses
Log errors and display appropriate messages to users.
try { var response = plugins.http.getData(apiUrl); var data = JSON.parse(response); } catch (error) { application.output(‘Error fetching API data: ‘ + error.message); plugins.dialogs.showErrorDialog(‘Error’, ‘Unable to retrieve data. Please try again later.’); }
6. Test and Debug
Use tools like Postman or Insomnia to test API calls before implementing them in Servoy. Servoy’s debug tools can help fine-tune your integration.
Best Practices for API Integration in Servoy
1. Optimize API Requests
Minimize redundant API calls by implementing caching strategies or local storage when appropriate.
2. Secure Credentials
Store sensitive data like API keys in Servoy’s secure storage or environment variables to protect them from unauthorized access.
3. Monitor Usage
Regularly track API usage to avoid hitting rate limits or incurring unnecessary costs.
4. Stay Updated
Keep up with API updates, as providers may change endpoints, authentication methods, or response structures.
Example: Weather API Integration
Let’s walk through integrating a weather API into a Servoy application:
Step 1: Obtain an API Key
Sign up with a weather API provider and get your unique API key.
Step 2: Create an API Call
Use plugins.http to fetch weather data.
var response = plugins.http.getData(‘https://api.weatherapi.com/v1/current.json’, { key: ‘your_api_key’, q: ‘San Francisco’ }); var weatherData = JSON.parse(response);
Step 3: Display Weather Information
Bind the parsed data to your UI components to display temperature, humidity, or other conditions.
Conclusion
API integration is a cornerstone of modern application development, enabling seamless access to external resources and services. Servoy’s robust features make it easy to interact with APIs securely and efficiently. By following the outlined steps and best practices, you can harness the power of external APIs to build feature-rich, scalable applications tailored to your users’ needs.
Explore API integration with Servoy and unlock endless possibilities for creating powerful, connected solutions.
If you are looking for any services related to Website Development, App Development, Digital Marketing and SEO, just email us at nchouksey@manifestinfotech.com or Skype id: live:76bad32bff24d30d
𝐅𝐨𝐥𝐥𝐨𝐰 𝐔𝐬:
𝐋𝐢𝐧𝐤𝐞𝐝𝐢𝐧: linkedin.com/company/manifestinfotech
𝐅𝐚𝐜𝐞𝐛𝐨𝐨𝐤: facebook.com/manifestinfotech/
𝐈𝐧𝐬𝐭𝐚𝐠𝐫𝐚𝐦: instagram.com/manifestinfotech/
𝐓𝐰𝐢𝐭𝐭𝐞𝐫: twitter.com/Manifest_info
#Servoy #APIIntegration #ExternalAPIs #LowCodeDevelopment #WebDevelopment #API #JSON #OAuth #APIAuthentication #APIRequests #APIResponses #SecureAPIs #DataIntegration #WeatherAPI #APIIntegrationGuide #DataDrivenApps #SoftwareDevelopment #ApplicationDevelopment #RealTimeData #APIKeys #AppDevelopment #ScalableApps #TechSolutions #APIIntegrationBestPractices #UIIntegration #ServoyDevelopment #APICalls #WebServices #DigitalTransformation #TechInnovation #BackendDevelopment #FrontendDevelopment